

Making your own candles is a simple way to create a greener, healthier home fragrance. Store-bought options can release toxins that are harmful to your health, whereas DIY projects let you choose ingredients that cut indoor pollutants and reduce waste.
Beyond the environmental and health wins, it is a satisfying, low-cost craft that fits neatly into a green living routine. If you’re ready for clean-burning, beautiful-smelling candles, they’re much closer than you think.
Gather Your Supplies
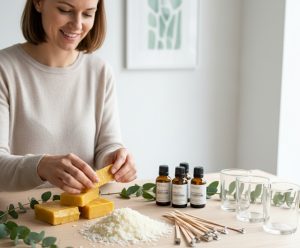
Before you start, set up a small workspace and gather everything you need. Using the right gear keeps your candles safe and truly non-toxic.
There are three main types of natural waxes: soy, beeswax, and coconut. Soy wax is beginner-friendly, has a good scent throw, and a clean burn. Beeswax offers a long burn time of one hour per inch, a light honey scent, and naturally filters some indoor air particles. Coconut burns slowly and evenly with an excellent aroma. You can also combine any of these to improve hardness, melt pool and fragrance performance.
More essentials include:
- High-quality wicks: Cotton or wooden wicks work well. The right one prevents soot, smoking, and tunnelling.
- Fragrance: Use essential oils or candle-safe fragrance oils.
- Heat-proof containers: Glass jars, tin tins, and ceramic vessels are great options.
- Double boiler: Use this to melt wax gently and prevent scorching.
- Pouring pot: A pitcher makes transferring hot wax clean and controlled.
- Kitchen scale: Weigh wax and fragrance for consistent results.
- Thermometer: A thermometer ensures you pour at the right temperature for adhesion and scent throw.
- Wick centring tools: Hold the wick perfectly centred while the wax sets.
Choose the Right Materials for a Clean Burn
The wax, wick and aroma determine whether your candle smells great, burns clean and lasts a decent amount of time.
What to Use and Avoid for Wax
Skip paraffin if you can. It’s a petroleum by-product that can give off soot and toxic volatile organic compounds (VOCs). VOCs are carcinogenic and can cause you to feel sick depending on the concentration level, whether it’s a headache, nausea or respiratory problems. Use natural options instead that burn cleaner and often last longer. For example, soy wax can last 35%-50% longer than paraffin.
Essential Oils vs. Fragrance Oils
Synthetic fragrance oils can also have VOCs, which is why so many prefer essential oils. They’re perfectly safe to add to candles, but their throw scent can be weaker. Choose options labelled safe for this type of use, and note that essential oils often require a higher amount for a stronger smell.
The Right Wick
Choose a wick that keeps the flame steady, stops tunnelling, and cuts down on soot. Pick cotton, eco-friendly tissues, or wooden wicks sized for your container and avoid metal-core options. Match wick size to the vessel diameter and the wax you’re using, and trim about one-quarter inch before each burn for the best flame.
Your Step-by-Step Guide to Making a Nontoxic Candle
Follow these simple steps to make your first candle.
1. Measure Your Wax
First, determine your jar’s capacity. Fill the vessel with water to the level you’ll fill with wax, then pour it into a measuring cup to determine the fluid ounces.
For most containers, you can purchase the same amount of wax by weight as the measured fluid ounces. You should have a little extra for test pours or spills. Working in batches helps — weigh once and multiply for identical jars to avoid under- or overbuying.
2. Melt the Wax
Melt your wax slowly in a double boiler or a heat-safe bowl set over a pot of simmering water, stirring occasionally until it turns into a translucent liquid. Follow the temperature guidance from your wax supplier, as overheating can scorch the wax and alter the scent. Low and steady heat is the best method.
3. Secure the Wick
Attach the wick tab to the bottom centre of the jar using a wick sticker or a small amount of hot glue. Then, use a centring tool — such as a pencil or clothespin — to hold the wick vertical while you pour. Doing all your wicks first makes the process smoother once the wax reaches pouring temperature. Additionally, a stable wick in the centre prevents tunnelling, resulting in a nicer, more even burn.
4. Add Fragrance
Now it is time to make your candle smell divine. The recommended usage rate for fragrance load is 6% or 1 ounce per pound of wax. If you use essential oils, start with 6%, then add more to your liking — up to 10%.
Add fragrance at the temperature recommended by your wax maker and stir gently for at least 30 seconds to fully disperse the scent. If you want colour, use dye and add it sparingly.
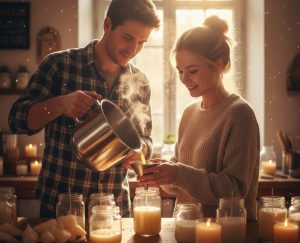
5. Pour, Cool, and Cure
Pour slowly and steadily into the centre of the jar and leave some room for headspace. Let the candles cool on a flat surface and cure for at least 24 hours. For improved scent throw, leave them for one to two weeks. Before you light, trim the wick for a clean burn.
Enjoy Your Nontoxic Candles
Creating nontoxic candles is a simple, rewarding way to replace harsh chemicals with cleaner air while reducing your carbon footprint. Follow each step carefully, take notes on your results, and view your first few batches as experiments. With a few adjustments, you’ll soon discover the formula that suits you best.
![]()
Author Profile

- Eco Warrior by day, Eco Blogger by night trying to get the eco balance right.
Latest entries
 Green Business NewsMarch 13, 2026How Large-Capacity Above Ground Storage Tanks Streamline Operations & Cut Deliveries
- Best practicesFebruary 20, 2026How To Reduce Waste Through Smarter Office Supply Choices
- Green GuidesNovember 3, 2025The Beginner’s Guide to Making Your Own Nontoxic Candles at Home
- Green Home GuidesOctober 14, 2025What are Eco-Friendly Tissue Options for Modern UK Homes?


Leave a Reply
You must be logged in to post a comment.